Styling Liferay: creating a Liferay Theme
In most Liferay projects, a custom Liferay theme needs to be developed and this article explains to developers how to do this.
Note that the Liferay documentation already has some nice pages on creating Liferay themes, but we are taking a more hands on approach.
Setting up the theme project
We are assuming you will be using Eclipse, but will always tell what is going on under the hood, so other IDE(or commandline!) guys should also be able to follow.
You should start out by downloading the Liferay Plugins SDK from the bottom of the Liferay additional files page.
Eclipse users should also install the Liferay IDE Eclipse Plugin and add a Liferay Server(and runtime) after. More info on how to do this can be found in the Liferay documentation on installing the Liferay IDE or at this very own blog, in the last part of the getting started with portals and Spring Portlet MVC post.
If you were already working with Liferay, you probably had these installed already anyway and the only thing you need to do then, is start your Liferay server.
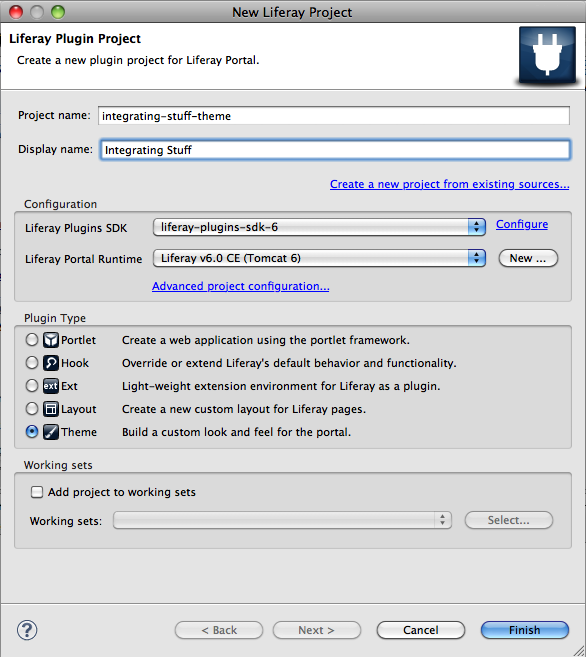
Then, within Eclipse, choose New>Project>Liferay>Liferay Project and then check Theme in the box.
What the theme plugin does is run a script from the <liferay-sdk-home>/themes folder that generates a Liferay theme project for you, in your Eclipse workspace.
You can run the script manually by entering
./create.sh integrating-stuff "Integrating Stuff"
or
create.bat integrating-stuff "Integrating Stuff"
in a terminal from the said <sdkhome>/themes folder.
The Liferay IDE also takes a look at your Liferay runtime and copies a bunch of files to the docroot folder of your project.
These files represent the _styled theme, a very basic Liferay theme, which can be found in the portal source in the portal-web/docroot/html/themes folder or in the docroot/html/themes folder of your Liferay install.
As the Liferay documentation indicates, almost all themes will use the “_styled” theme as a base. If you want to start from scratch, the parent of your theme would be the “_unstyled” theme. Inheriting from “_unstyled” would give you quite a bit more work but would give you full control of the theme.
Any of the files that were copied to your docroot folder can be overridden by your theme by placing them in your _diffs folder. In other words, the _diffs folder will contain all files that differ from your parent theme.
Note that, as already indicated above, the “_styled” theme is not production ready. Since our _diffs folder is still empty, our theme – which is currently not overriding anything and is an exact representation of the “_styled” theme – would not look that great if we would deploy it to Liferay right now.
Therefore, it is a better idea to copy the content of the _diffs folder of the production ready theme you want to start from into your own theme’s _diffs folder. To start from the default “Classic” Liferay theme, download the portal source(link) and copy the _diffs folder from the Classic theme at portal-web/docroot/html/themes to your own theme’s _diffs folder.
Now your theme is production ready and ready for deployment.
2. Deploying the theme to Liferay
You probably already noticed the ant build script in the root of your project. If you run the default ant goal “deploy” of this script, the theme is published to your Liferay server.
(If you are not doing this from within Eclipse, you need to properly set the values in the build.properties file in the ssdk’s theme folder.)
Let’s deploy and enable our theme on our Liferay server, which for now, looks exactly the same as the default “Classic” theme. If the theme deployed successfully, the Liferay logging should contain something like:
3. Overriding parts of the parent theme
The content of the_diffs folder we copied from the Classic theme consisted of 3 folders: css, images and js(javascript). In the _styled theme there is one additional folder, templates, of which the classic theme does not override anything. This is recommended practice: themes should try to avoid overriding template files since they are likely to change in between Liferay versions so changing them might make porting the theme to a new Liferay version more difficult.
a. overriding css
Now, to add a nice gradient background image and change the default text size and font, we have to modify our custom.css file.
We will change the
body {
	background: #EEF0F2;
	font-size: 11px;
}
into:
body {
        background-color: #4F555B;
	background-image: url("../images/layout/bg-grad.gif");
	background-repeat: repeat-x;
	color: #FFFFFF;
	font-family: Verdana,Helvetica,sans-serif;
	font-size: 11px;
}
and also create a layout_folder in our images folder and add the file bg-grad.gif to it.
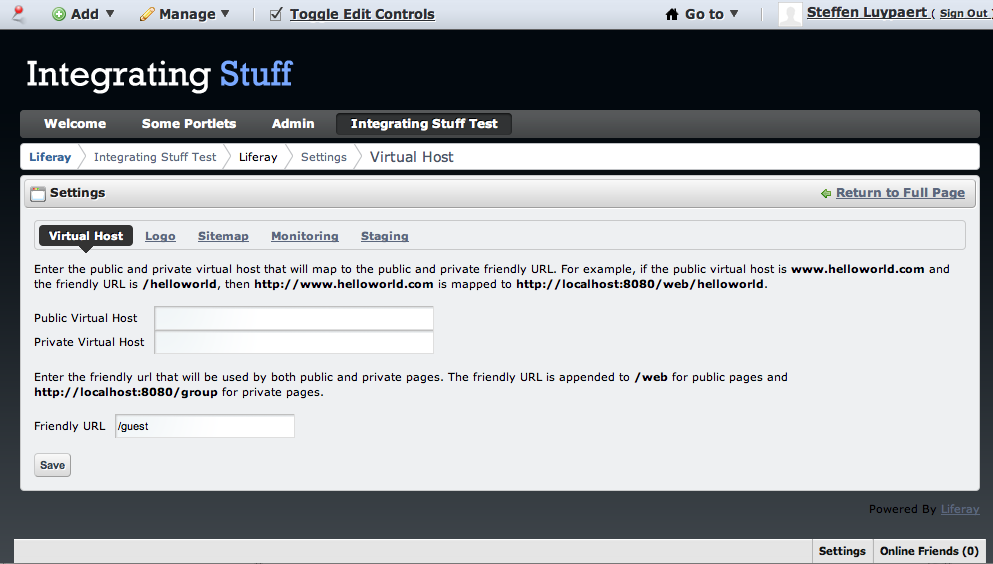
If we redeploy the theme and load our Liferay page, we see that the background has changed and text appears a bit different. Pretty easy, huh.
b. Overriding and adding images
In the previous section, we already added a background image to the theme. If you want to override an image, you just need to add it to the images folder as well, but the image needs to have the same folder structure and file name as the one you want to override.
For example, if you want to override some emoticons, you would create an emoticons folder(you need to look at the _styled theme files to know what you can override) and start putting names there of files that also exist in the parent theme(angry.gif, blank.gif,..).
c. Overriding the custom javascript
This can be done the same way images are overridden. However, the _styled theme only has one javascript file: main.js, which, with Liferay 6, only contains some logic that keeps the Liferay breadcrumbs always on screen.
d. Overriding the template files
As mentioned already, the Liferay documentation advises to avoid overriding the template files. That being said, almost all projects I know off involved creating themes that were modifying these templates.
If one wants to add or remove parts of the page and the modifications go beyond styling dom elements, these templates are usually changed. The view technology these files use is Velocity.
The two most important ones are portal-normal.vm – which renders the whole page – and portlet.vm – which renders one portlet. The other ones respectively define additional velocity variables(init_custom.vm), render the navigation bar(navigation.vm) and render the popup pages(portal_pop_up.vm).
Let’s take a look at the portal-normal.vm Velocity template:
<!DOCTYPE html>

#parse ($init)

<html class="#language("lang.dir")" dir="#language("lang.dir")" lang="$w3c_language_id">

<head>
	<title>$the_title - $company_name</title>

	$theme.include($top_head_include)
</head>

<body class="$css_class">

#if($is_signed_in)
	#dockbar()
#end

<div id="wrapper">
	<a href="#main-content" id="skip-to-content">#language("skip-to-content")</a>

	<header id="banner" role="banner">
		<hgroup id="heading">
			<h1 class="company-title">
				<a class="logo" href="$company_url" title="#language("go-to") $company_name">
					<span>$company_name</span>
				</a>
			</h1>

			<h2 class="community-title">
				<a href="$community_default_url" title="#language("go-to") $community_name">
					<span>$community_name</span>
				</a>
			</h2>

			<h3 class="page-title">
				<span>$the_title</span>
			</h3>
		</hgroup>

		#if(!$is_signed_in)
			<a href="$sign_in_url" id="sign-in" rel="nofollow">$sign_in_text</a>
		#end

		#if ($update_available_url)
			<div class="popup-alert-notice">
				<a class="update-available" href="$update_available_url">#language("updates-are-available-for-liferay")</a>
			</div>
		#end

		#if ($has_navigation)
			#parse ("$full_templates_path/navigation.vm")
		#end
	</header>

	<div id="content">
		<nav class="site-breadcrumbs" id="breadcrumbs">
			<h1>
				<span>#language("breadcrumbs")</span>
			</h1>

			#breadcrumbs()
		</nav>

		#if ($selectable)
			$theme.include($content_include)
		#else
			$portletDisplay.recycle()

			$portletDisplay.setTitle($the_title)

			$theme.wrapPortlet("portlet.vm", $content_include)
		#end
	</div>

	<footer id="footer" role="contentinfo">
		<p class="powered-by">
			#language("powered-by") <a href="http://www.liferay.com" rel="external">Liferay</a>
		</p>
	</footer>
</div>

</body>

$theme.include($bottom_include)

</html>
If one would want (and is allowed to) remove the “Powered by Liferay” line, he can easily do this by just removing the line containing the text.
If the static htmldesign/prototypes are already made by web designers, it is easy for developers to port this created design to Liferay by copying the html to the portal-normal.vm file and inserting the Velocity directives where required.
All these Velocity templates are clearly readable. When taking a look at the above file, it is obvious how to replace the whole Liferay header, for example.
4. More advanced stuff
There is more advanced stuff one can use to fine tune a theme and is not covered by this tutorial – such as adding settings or color schemes to a theme. Although this tutorial gets you started from a practical point of view, it is probably a good idea to scan through the Liferay documentation on themes as well.


 In this blog, Steffen Luypaert gives tutorials on how to integrate Java frameworks and third-party APIs with each other.
Liferay theme creation is not easy as other CMS, but I like the steps you provided for new user of Liferay.
Thanks for sharing.
in LR 6.1 a theme can override the Liferay logo by targeting
.logo.default-logo
when an admin sets the logo then its class changes to .logo.custom-logo
Was this answer helpful?
LikeDislikeThanks for the detailed information for creating themes,
its really usefull
The step which is mentioned here is fine enough.Yes it is required to
customize the vm file depending upon the requirement.
it is very useful for beginners
Was this answer helpful?
LikeDislikeCooool !!!
Hello All,
Thanks for posting Theme development. These are good for new(learner)people.
Regards…
Ashish
Was this answer helpful?
LikeDislikeplease Help… How can i put one new Navigation bar or images or any (but new input not modified)in the Liferay Pages.. at least please help me to download a liferay themes …
Was this answer helpful?
LikeDislikeHi,
I’m using Liferay 6.06 and I’ve created web contents which is built from template and structure.
How to embed one web content in another web content (not a theme) with some velocity code ?
Was this answer helpful?
LikeDislikeBest article on creating a basic theme till date. I was struggling with themes since last 10 days as I am not a UI developer or designer and by following your article my first theme is up and running. Most of the other articles available on net are over hyped and don’t explain it in such simple language… BIG THANKS.
Was this answer helpful?
LikeDislikeThere is no detailed document avilable for creating custom theme in liferay. I have struggled for last 1 week.
This ariticle is awesome. After i have gone through the stpes, i have successfully created custom theme. Now i am comfortable in creating my own theme with different look and feel.
Really it is very useful for beginners….::)
Was this answer helpful?
LikeDislikeHi, I get an error when trying to create a new theme, – “Error creating Liferay plugin project”, I’ve searched on the internet and can’t find anything helpful on this. I have my plugins and runtimes for Liferay/Eclipse properly installed. Would be glad if i could be given some solution to this problem.